The one of the functions that FLOWii offers for free and without any limitations is online invoicing. Now will go trough the easy steps and in the end, you’ll be able to issue an invoice in just a couple of minutes.
First step
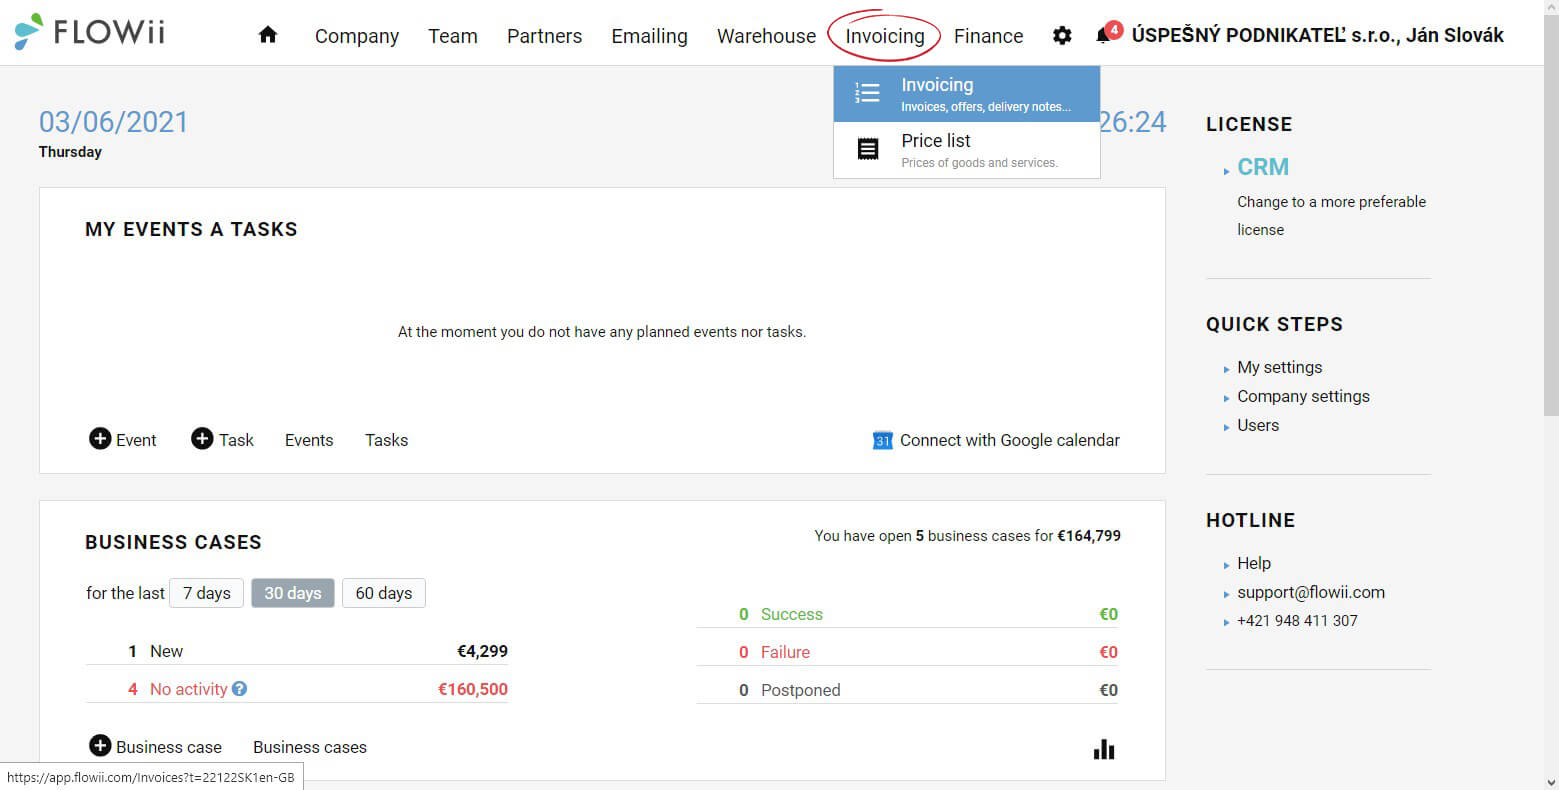
The first step is registration with your email. When you register, 30 days free trial will start. In this period, you are able to use all the features that our software supports. After 30 days you'll still be able to issue an invoice, however for other services you must pay. When you register, the main FLOWii dashboard will appear. Now, if you want to issue an invoice, click the Invoicing on the upper menu bar.
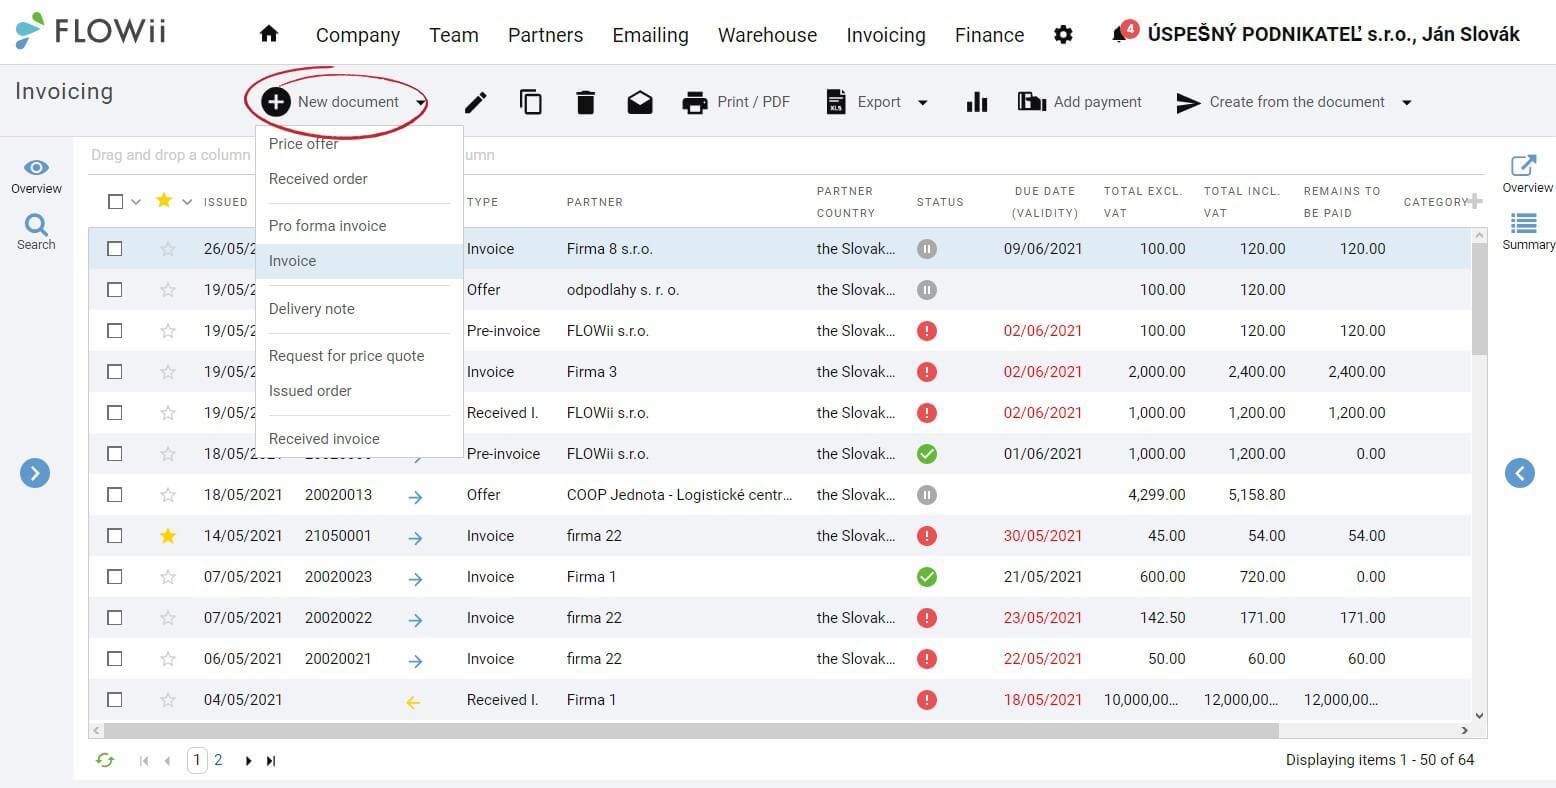
Here you can find all your previous issued documents. Now, you have to click a little plus icon labelled New document. Here you can choose from a few different documents, but for now, will choose Invoice.
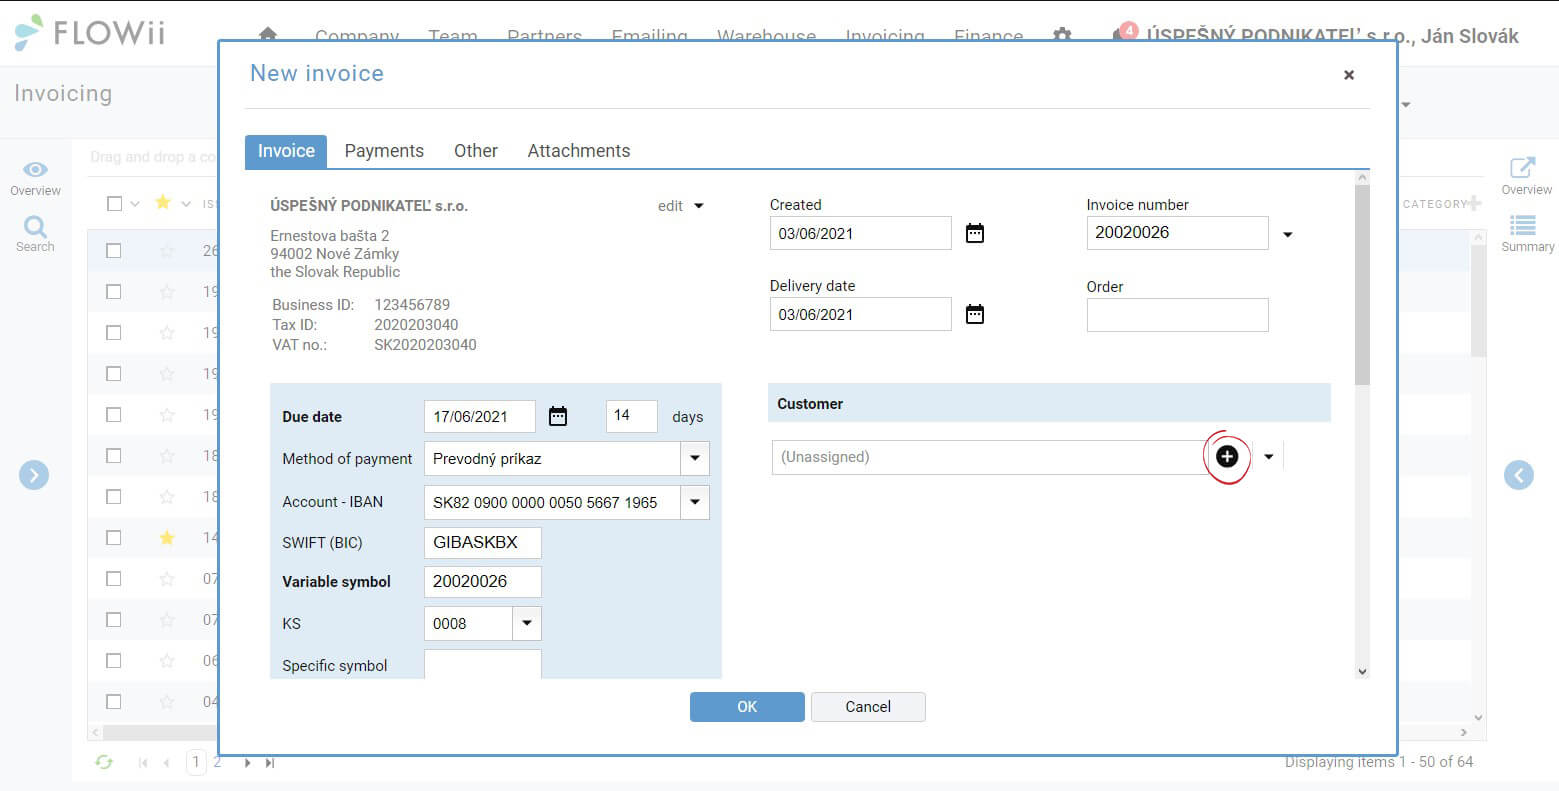
The window will pop up and you need to, first, fill all your invoicing details and then click on customer. Since this might be your first invoice you need to fill all the customer information manually.
The big advantage of FLOWII is the synchronization of CRM database and other administrative tasks. The CRM database records not only data about customers, but also data about business partners. Therefore, if you regularly issue invoices to an entity, the system will already record that customer or vendor in the CRM database, so you won't always have to re-fill in your billing information.
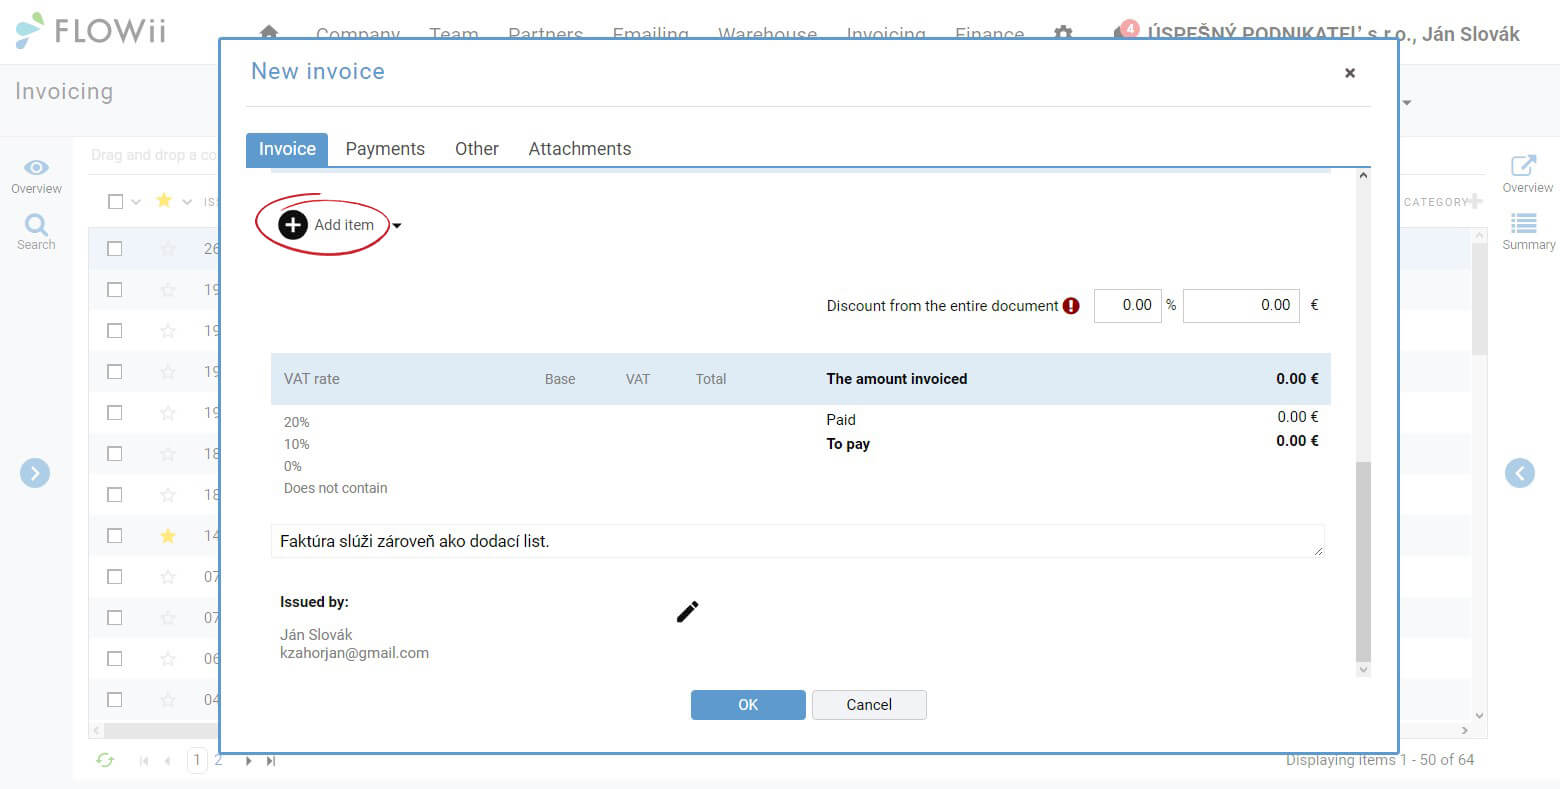
In the next step, fill other important information such as product or service that you are offering and the price, quantity of it. You can also add discount if necessary. Again, you can either add product or service manually or just choose one from your database.
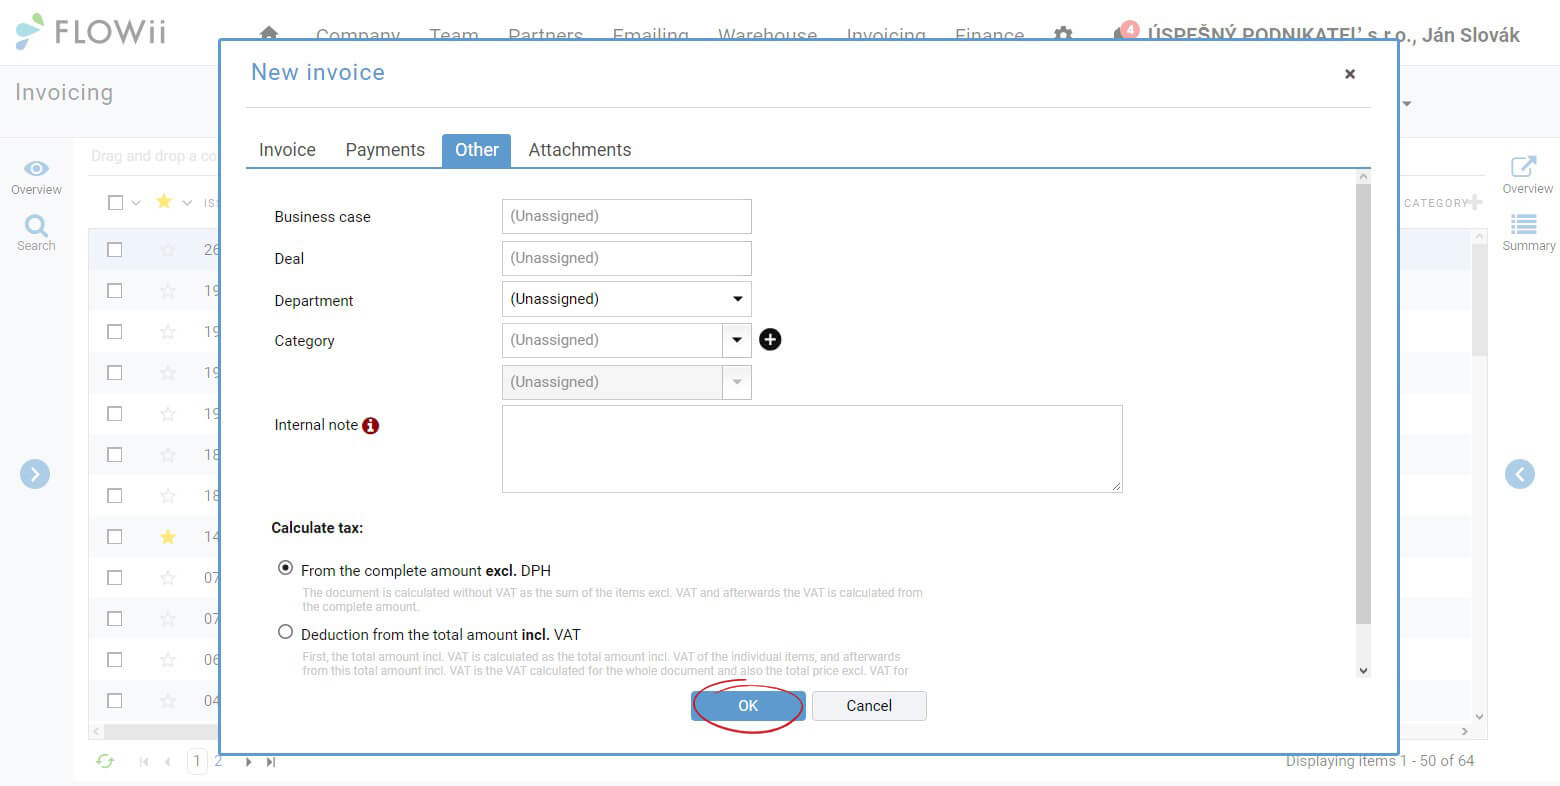
Now you can just hit OK and you are done. However, you can also continue to add payments already made or not to your invoice for a better view of your finances. In the next step, you can connect the invoice to business case (another function that FLOWII offer) All the data will be stored in cloud database for better preview of current or past business.
The system also allows you to add attachments, either from your device or from the cloud, such as Google Drive.
If you click OK now. The invoice will appear as the first item in your records.
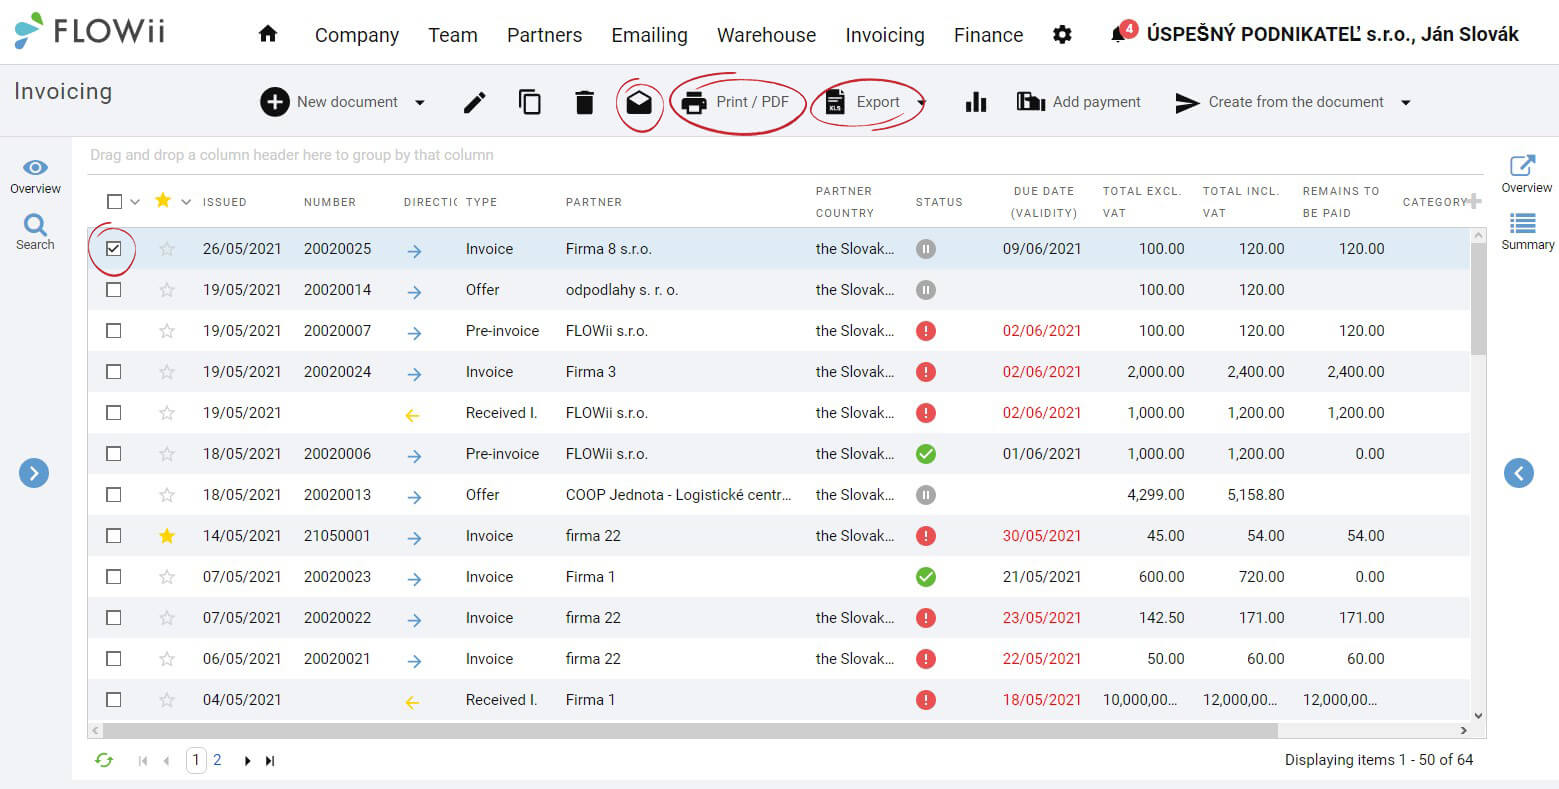
If you want to print the invoice, you need to mark it, as you can see in the picture, and click Print / PDF.
If you want to send the invoice directly by e-mail, click on the envelope icon - send the marked documents by e-mail and enter the necessary data and the recipient of the e-mail. You can also export the document to Excel format or to accounting services such as Pohoda or Omega.

